
The purpose of this civil method statement is to define the procedure for the preparation and application of cement plaster works that shall receive acrylic epoxy paint to the external elevations of the buildings.
This method statement is applicable to the plastering work at all external elevations including the balcony walls of the buildings.
Material delivery, Storage and Handling
All materials related to plastering work delivered to the project site will be inspected to ensure its compliance to the approved material submittal.
Any material delivered to site not conforming to the approved submittal will be rejected.
Upon delivery of materials to the project site, a Material Inspection Request (MIR) shall be raised to the consultant for inspection & approval.
Approvals
A mock-up will be made for the consultant approval; the location of the mock up has been identified to be the elevation of building. Once the mock up is approved, the main work will proceed in compliance with the approved mock up.
All shop drawings, materials and accessories shall be approved before plaster work activities take place.
Sequence of activities:
- Completions of RCC and block work in the area intended for plaster
- Construction of the external scaffolding and clearance form Safety department
- MEP services of embedment of MEP conduits and GI switch sockets
- Repair for the chasing of MEP services and defective concrete if any
- Protection of MEP services like switch sockets, draw wires, pipes, conduits etc
- Clearance from MEP
- Fixing of expanded metal lath over the repaired chasing and block work-concrete joints
- Hacking and splatter dash (Rush coat)
- Fixing of corner beads, Stop beads and plaster dabs
- Final coat of plaster
- Curing of plaster and drying time
- Painting
List of tools materials and equipment’s
- Aluminum Straightedge
- Plastic Tubs
- Wheel Barrow
- Masonry tools
- Chipping hammer
- Slow speed drill
- Plumb bob
- Fishing line/Thread (Line dory)
- Dash bond SP (rush coat)
- Ready Spread Plaster
- Acrylic Sealant
- Control joint bead
- S.S Plaster Accessories
- Plaster angle bead
- Plaster stop bead
- Coil lath
Plaster Application
Plaster will be done in two coats, the first coat shall be rush coat and the second coat shall be the finish coat.
Completion of MEP Works
Plastering shall not be commenced until all chasing, conduiting for mechanical and electrical services and piping for plumbing services etc. are installed.
Prior to starting any plastering activities, a clearance to proceed for the area shall be received from the MEP contractor to ensure that all the MEP pipes/ conduits are in place and no further chasing in the area is required.
Repair for chasing and defective concrete
All the chasing done for the MEP services is made good.
Any defective concrete like honey combing, bulged concrete etc. should be repaired as per the approved method statement and materials.
Wall/soffit joints treatment
The wall / soffit joint at the external elevation will be treated as follow:
Joint will be cleaned from any dust, loose material, chemical, oil or grease.
25 mm diameter polyethylene backing rod will be inserted to adjust the depth of sealant application to the required depth of 12 mm.
Approved Acrylic Sealant will be used at wall/soffit joint of non-fire rated walls. It will be applied using putty knife or spatula.
Press the sealant into the joint to ensure firm and full contact with the joint surface and to avoid bubble trap.
Any tooling of the sealant surface must be carried out immediately using a joint soaked shaping tool or well soaped finger.
Sealant shall not be applied in a rainy weather, high wind or sand storms.
The manufacturer instructions regarding the application of Acryseal shall be strictly followed.
Request for inspection and approval RFIA will be raised to the consultant for inspection of the joint sealant application.
Fixing plaster accessories
All the external plaster accessories shall be stain less steel as per the approved material submittals.
Stain less steel mesh coil lath will be fixed at the junctions between block and concrete elements.
Stain less steel mesh corner lath will be fixed at the inside corner junctions between block and concrete elements.
Metal Lath will be fixed using stain less steel nails and washers at 100 mm centres. It shall be over lapped by minimum 150 mm.
Stain less steel angle bead will be fixed at the wall angles.
Stain less steel plaster stop bead will be fixed at all exposed termination ends of plaster and shall be used where called for or as required to stop plaster surface to form a neat and definite joint.
Stain less steel control joint bead will be used at the wall / soffit joints to cover the Acryseal joint sealant.
Plaster beads shall be fixed using stain less steel nails and washers or cement sand mortar dabs at maximum pitch of 600 mm as per the manufactured recommendations.
Request for inspection and approval RFIA will be raised to the consultant for inspection of plaster accessories installation.
Rush coat Application
All the adjacent finished work should be protected using polythene sheets, joints lapped and sealed with masking tape before the rush coat work started.
The wall surface shall be moistened (but not soaked) using spray water prior to the commencement of rush coat application.
Approved rush coat material, DASHBOND SP, will be prepared as per the manufacture instructions. Please refer to the data sheet.
Mix the rush coat by adding 50 kg of Dashbond SP into a container of 11 liter of clean water. Mix until a uniform, lump free consisting mix is achieved.
For mixing process, a slow speed drill (200-300 rpm) shall be used, let the composition stands for approximately 5 minutes and remix again.
Apply the mixture using a suitable spraying unit or with Tyrolean machine manually till achieving the required thickness (2 to 3 mm).
The applied rush coat will be cured for minimum 2 days by spraying water.
The manufacturer instructions regarding the mixing and application of Dashbond SP shall be strictly followed.
Plaster dabs
Plaster dabs will be prepared from top to the bottom of the elevation to guide the masons to ensure the verticality and alignment of the completed plaster prior to the commencement of the finish coat of plaster.
Plaster dabs will be established levelled and checked using stretched nylon fishing line and Aluminum straightedge.
RFIA will be raised to the consultant for inspection of the Rush coat/ Spatter dash coat and the level dabs installation and alignment.
Finish coat application
The finish coat mix will be ready mix mortar supplied by supplier as per the approved material
Prior to the commencement of finish coat application, the rush coat shall be dampened (but not soaked) by spraying water.
The plaster mortar shall be applied with sufficient pressure to ensure a good bond with the rush coat.
Surface shall be rough floated and then finish floated to a smooth surface.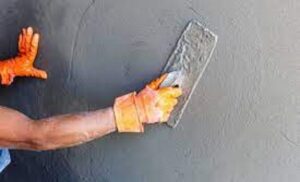
The application of finish coat plaster will be taken place to be aligned with the pre-established dabs and plaster beads.
Finished plaster shall be in plumb, square and true to line and level using the Aluminum straight edge, steel right angle and plumb bob.
The angles and corners shall be made square and true to the right angle.
Finish coat will be cured for minimum 3 days.
Mortar splashes shall be kept at a minimum and all horizontal surface and cavities shall be protected from mortar accumulation.
Any faulty damaged work shall be repaired or replaced.
The plaster will be adjusted/ trimmed around the GI electrical boxes to be completely aligned with the whole surface.
RFIA will be raised to the consultant for the inspection of the finish coat of plaster at the same day of application while it is still green.
Stages of RFIA’s
With reference to the ITP, RFIA’s will be raised to the consultant in two stages as follow:
RFIA # 1: After installation of plaster accessories and dabs to check:
- Sealant applied to the wall/soffit joint from the external side
- Application of rush coat
- Metal lath and plaster accessories are installed
- Plaster dabs are done properly
RFIA # 2: After application of plaster finish coat to check the alignment, plumb and quality of plaster finish coat application.
Tolerances
Finished Plaster surfaces shall be true plane with max deviation of 2 mm when measured using a 3 m straightedge.
ATTACHMENTS
- Inspection Checklists
- Inspection Test Plan
- Risk Assessment
- Technical Data sheet (TDS)
- Sheets for plaster accessories extracted from approved Submittal